Sanity Checker Pro Help
What Does it Do?
Sanity Checker Pro checks for the same problems as Sanity Checker Basic, that is
- troubles reading files,
- validation problems,
- syntax errors, and
- broken XREFs, CONREFs and broken links to images,
and produces a report with links that take you directly to the source of a problem.
In addition Sanity Checker Pro can check for links
- outside of the suite root directory,
- outside the document root directory, and
- between files in "restricted" directories.
How does it Work?
Sanity Checker Pro follows all of the links in a DITAMAP or the DITA files in a directory, then follows all of the links in those files until there are no more DITA files to check.
It then compiles all of the results in an easy to read report (itself a DITA file) that details the results for every file it has checked.
Sanity Checker is unique in that it can report a link as broken even if it is valid, that is it can detect valid links that you have specified to be a problem. This ability is very important, as explained in the following examples.
Suite Root Errors: Reporting Links that Cross Releases
Suppose you have a directory organization that mirrors the release levels of the software you are documenting. Like this:
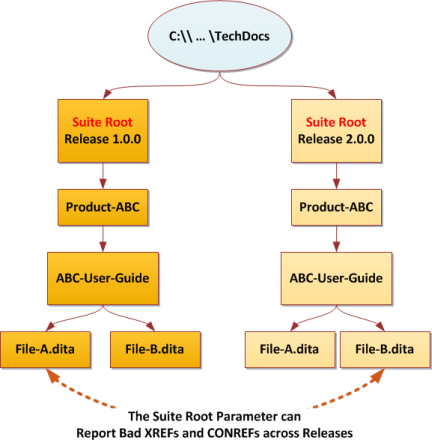
It is very common to have a cross-reference that goes from release 2.0.0 back to release 1.0.0, for example from Release 2.0.0\...\File-A.dita back to Release 1.0.0\...\File-B.dita. These links may be correct from an XML linking point of view, but are wrong from a business point view.
Sanity Checker Pro allows you to detect these with it's Suite-Root option. It allows you to tell Sanity Checker that links within the suite are OK but links to other suites are not.
Document Root Errors: Reporting Links that Cross Documents
Suppose you have a directory organization that contains several titles in one suite. Like this:
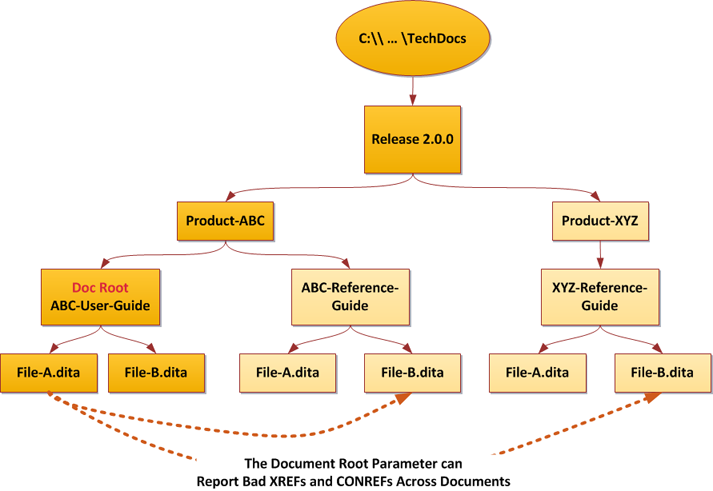
It is very common to have a cross-reference that goes from one document to another, for example from ABC-User-Guide\File-A.dita back to ABC-Reference-Guide\File-B.dita or from ABC-User-Guide\File-A.dita back to XYZ-Reference-Guide\File-B.dita. As with the suite root error, these links may be correct from an XML linking point of view, but may be wrong from a business point view.
Sanity Checker Pro allows you to detect these with it's Doc-Root option. It allows you to tell Sanity Checker that links between DITA files in the document are OK but links to other documents are not.
Restricted Linking Errors: Reporting Link "Business" Errors Between CONREF Source Files
Suppose you have a directory organization that contains a "Common" directory which holds DITA files and graphics you CONREF into several documents. Like this:
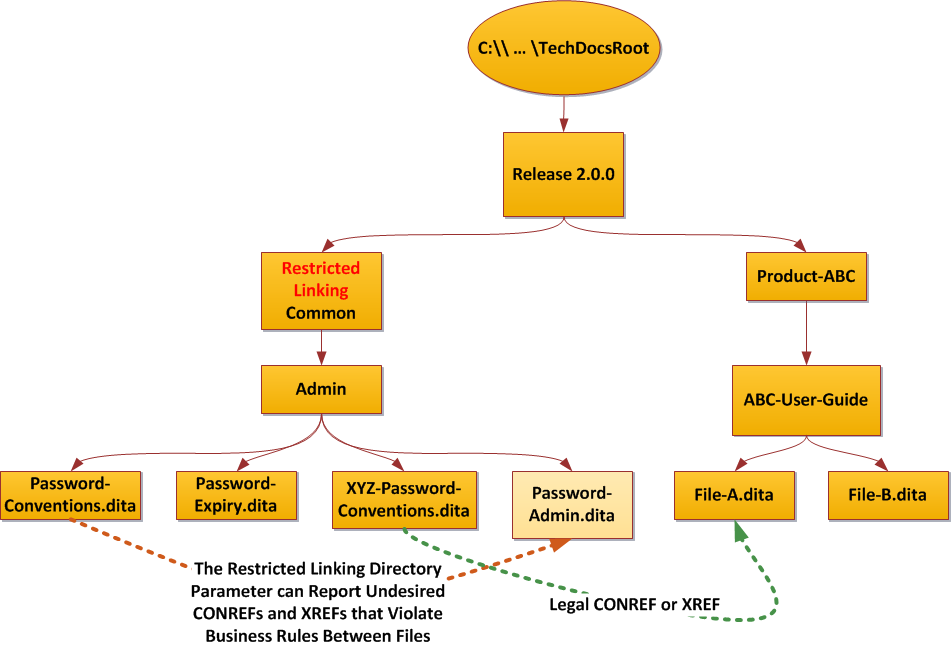
It is very common to have a cross-reference that goes from one CONREF fragment to another, for example from Password-Conventions.dita to Password-Admin.dita. As with the suite root error and the document root error, these links may be correct from an XML linking point of view, but may be wrong from a business point view.
The reason is rather simple. You may have a perfectly functional cross reference from Password-Admin.dita to Password-Conventions.dita for awhile, until software engineering "improves" the conventions for product XYZ. Then the cross reference should go from Password-Admin.dita to XYZ-Password-Conventions.dita, but only for product XYZ (and for select branches and sub-releases, but only for customers who ask for the feature, and ...).
Because of this and similar problems that arise with CONREFS and cross references most groups insist that cross references between CONREFs source files are illegal. You simply cannot tell in advance if both ends of a link between CONREF fragments will be present in any information product.
Sanity Checker Pro allows you to detect these links between CONREFs with it's Restricted Link Directories option. It allows you to tell Sanity Checker that links between DITA files in a particular folder are not allowed. Links within any one DITA file remain valid.
Related topics
None.
Prerequisites
- You should set the default "Output Root" and "Backup Root" directory under "Default Settings". This makes all modules in the Samalander Software Center easier to use.
How to Use the Samalander Sanity Checker Pro Module
- Open the Sanity Checker Pro module. This dialog appears:

- Select the input type, either a DITAMAP or a directory containing DITA files.
- Type or paste the input file name. You can use the "Browse" button to the right to select the file.
- Type or paste the output file name. You can use the "Browse" button to the right to select the file.
- Edit the configuration file. Click on "Edit Config" to open the configuration file dialog. The dialogs in the following sub-steps appear.
Suite Root Configuration
- Type or paste the path to the configuration file. You can use the "Browse" button to the right to select the file.
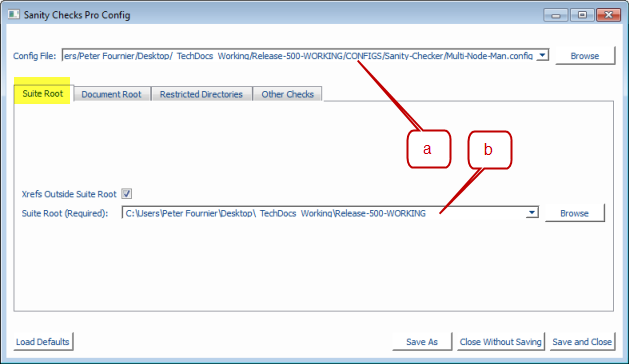
- Type or paste the path to the root directory of the suite. You can use the "Browse" button to the right to select the file.
Document Root Configuration
- Type or paste the path to the suite root. You can use the "Browse" button to the right to select the file.
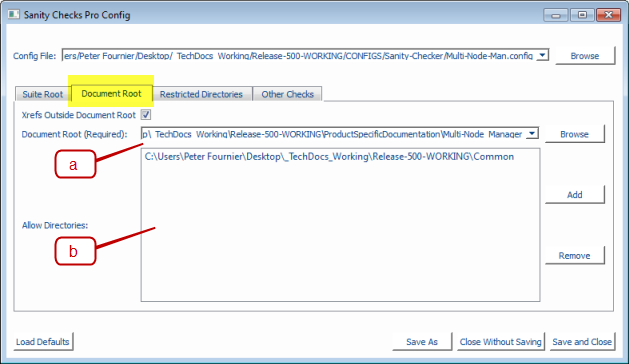
- Do not report links to these directories. Click "Add" or "Remove" to select directories to add or remove.
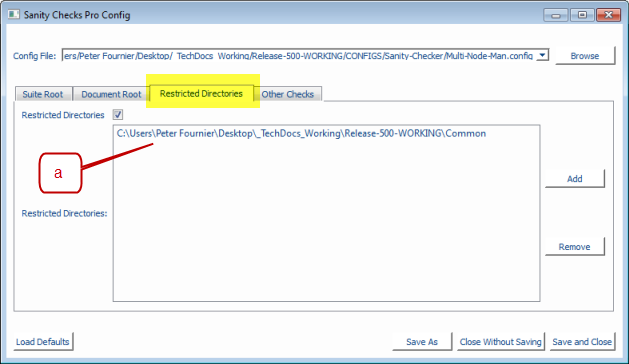
Restricted Link Directories Configuration
- Type or paste the path to the suite root. Click "Add" or "Remove" to select directories to add or remove.
"Other Checks" Configuration
- All options are selected by default. Deselect those you want to disable.
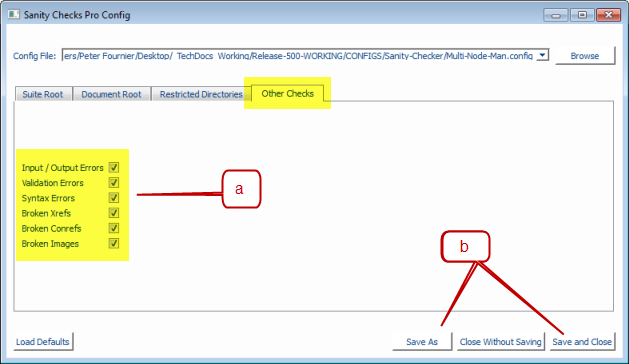
- Save the configuration file.
- Type or paste the path to the configuration file. You can use the "Browse" button to the right to select the file.
- Click "Run". The Sanity Checker Report will be written to the file selected in step 4.